Drawing an elephant might seem difficult at first, but by breaking it down into simple steps, anyone can do it! In this easy-to-follow guide, you’ll learn how to draw a cute cartoon elephant starting with just the eyes and building up to the full body.
How to Draw an Elephant?
Each step is explained clearly with simple lines and shapes, perfect for beginners and kids. This tutorial will help you create an adorable elephant in no time. Grab your pencil and let’s get started!
Step 1
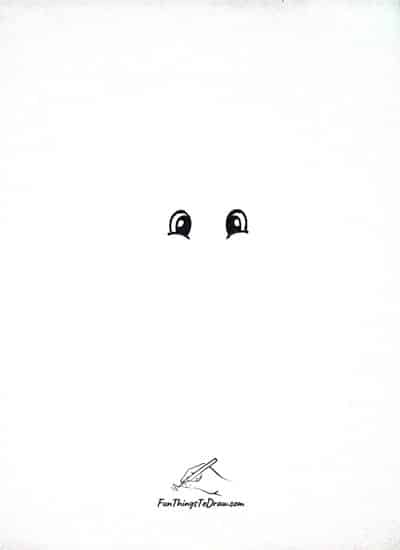
Start your elephant drawing by making two large cartoon-style eyes in the center of the page. Each eye is shaped like a small oval with a white circle inside for the highlight. Make the top of the eyes slightly thicker to give them a cute, expressive look. Leave some space between the eyes. These eyes will help guide the rest of the face. Keep your lines smooth and neat, using a pencil so you can make changes easily. This step forms the foundation of your elephant’s facial expression.
Step 2

Next, draw the elephant’s trunk starting between the eyes. Curve it downward and then bring it up slightly at the end to form a playful hook shape. The trunk should be thick and smooth, with the tip curled like a small letter “e”. Make sure it connects naturally between the eyes. You can add a small bump at the end of the trunk to show the nostrils. This step gives personality to your elephant and starts shaping its recognizable features.
Step 3

Now draw the shape of the elephant’s head. Begin by curving lines from above each eye and bring them down along the sides of the trunk. Add small cheek curves to give a friendly look. Make sure the head shape is wide and rounded. You can also draw small curved tusks sticking out below each eye. These tusks help complete the face and give your elephant more character.
Step 4
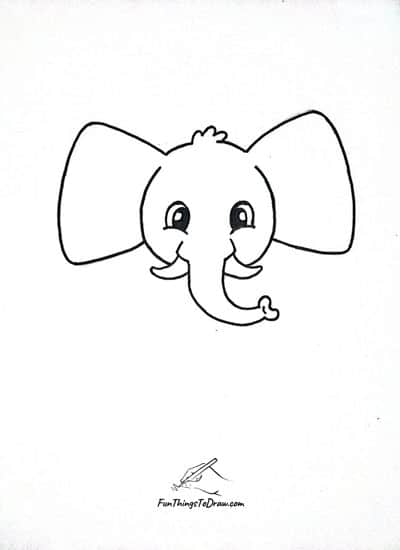
Draw two large ears on both sides of the head. The ears should look like big leaves or fans, starting from the sides and curving outward. Elephants have very large ears, so don’t be afraid to make them big and wide. Then, add a small tuft of hair at the top of the head using three short curves. The ears make the elephant look cute and realistic, and the hair adds a playful touch.
Step 5
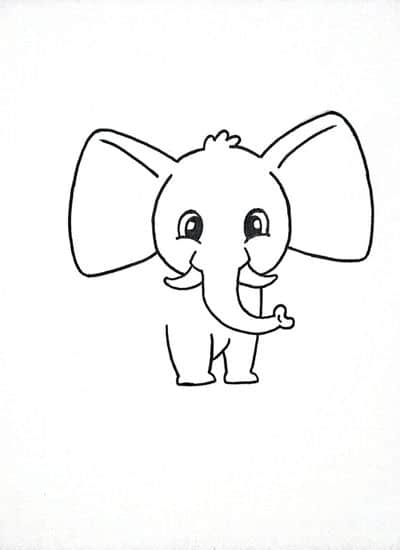
Now draw the front legs and start building the body. Draw two short, thick legs hanging down from the head. Leave some space between them to show the body’s width. Add a line to connect the legs at the top, hinting at the belly. You can also slightly extend the trunk downward to overlap a bit with the legs. This step begins to shape the full elephant figure.
Step 6
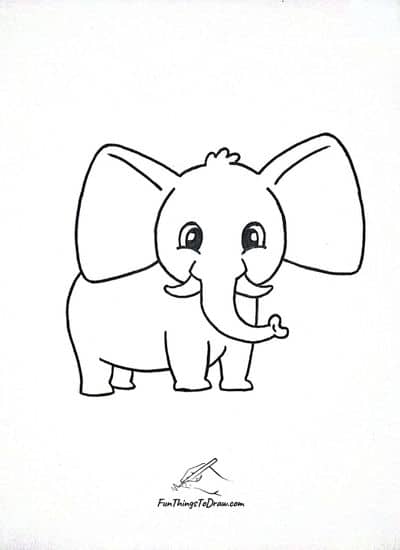
Extend the back of the elephant from behind the ears to form the body. Add two more legs behind the front ones, slightly shorter to show depth. Make the body round and strong, like a gentle curve from the head to the back. Connect the lines between front and back legs to complete the body shape. This step gives your elephant a solid, balanced stance and makes it look almost complete.
Step 7
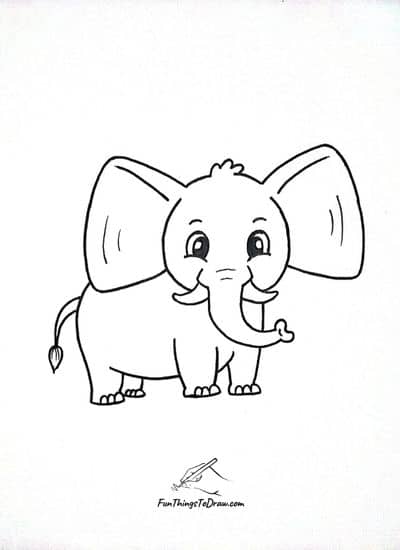
Finally, draw a thin, curved tail coming from the back of the elephant. Add a small tuft at the end of the tail like a paintbrush. Then, add simple line details inside the ears and on the feet to show folds and toes. Now your elephant looks alive and complete! You can go over the drawing with a pen, erase extra lines, and add color if you want. Great job—your elephant is ready!
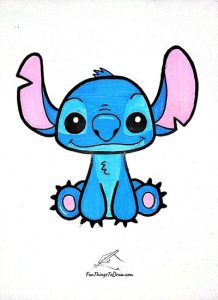
See also: How to draw stitch?