How to Daw a Pizza?
Drawing a pizza can be a fun and easy activity for kids and beginners. With just a few simple steps, you can create a tasty-looking pizza using basic shapes and lines.
How to Daw a Pizza?
This guide will show you how to draw a pizza from start to finish, starting with a circle and adding all the delicious toppings along the way. Each step is easy to follow and uses simple instructions. This pizza drawing tutorial is perfect for you if you are learning pizza drawing. Grab your pencil, and let’s start drawing a yummy pizza!
Step 1
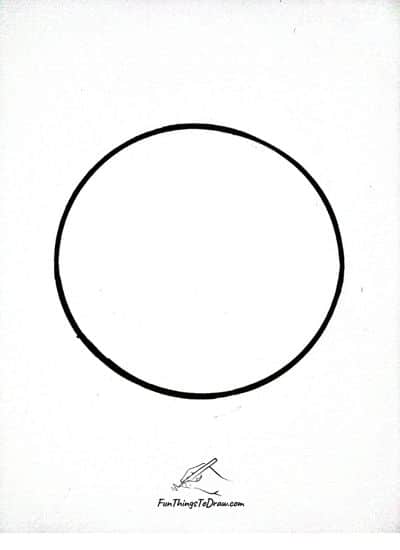
Start by drawing a big circle. This will be the base of your pizza. Try to make the circle as round as possible, like a big dinner plate. This is where all your toppings will go. Use a pencil so you can erase if needed. This first step gives you the main shape of the pizza, which is very important. Once you are happy with the shape, trace over it with a black marker to make it stand out. Now you’re ready for the next step!
Step 2

Inside the big circle, draw another smaller circle, but make the lines wavy. This wavy line will look like the outer edge of a real pizza crust. Make sure there’s a small space between the big circle and the wavy one to show the thick crust. This part gives your pizza a more realistic look. It’s okay if the waves are not perfect. The crust should go all the way around inside the big circle. Now your pizza is starting to take shape and looks more fun to draw!
Step 3
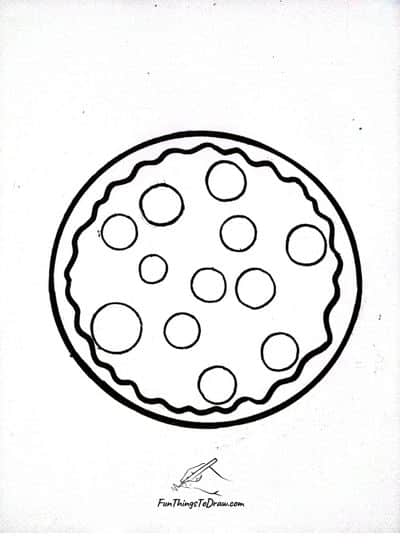
Next, draw several circles inside the wavy area. These are slices of pepperoni. Make the circles different sizes and spread them out all over the pizza. You can place some near the edges and some in the middle. Don’t make them too close to the crust. These toppings make your pizza look delicious. You can use a pencil first, then trace over with a black pen. This step adds yummy details to your drawing. The more toppings you add, the tastier your pizza will look!
Step 4

Now, draw small curved shapes that look like the top parts of mushrooms. These mushroom pieces should go in between the pepperoni slices. They look like half-moon or bean shapes. Keep the mushrooms spaced out so the pizza doesn’t look too full in one spot. These new toppings make your pizza look more interesting. Try to draw at least 10 – 12 mushrooms. This step helps add variety and makes the pizza even more realistic and fun!
Step 5
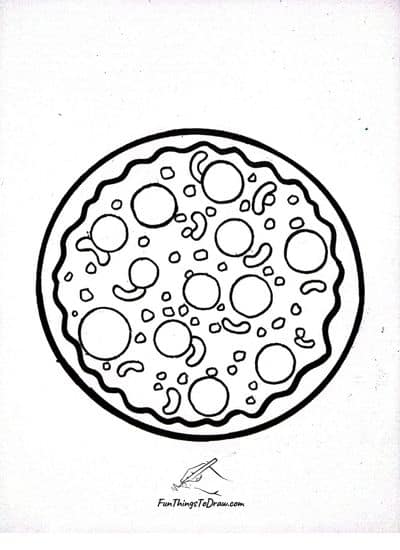
In this step, add small dots and tiny circles to fill in empty spaces. These are little veggie toppings like green peppers or olives. The small toppings make the pizza look fuller and more delicious. Spread them around evenly so your pizza has toppings everywhere. This step brings the whole pizza drawing together. Don’t forget to make the shapes simple so the drawing still looks clean. Now your pizza looks loaded and ready to eat!
Check also: How to draw penguin?
Step 6

Time to color your pizza! Use yellow or orange for the cheese, red for pepperoni, brown for the crust, and green for little veggie pieces. You can also color the mushrooms with a light gray or tan. Be careful to color inside the lines. This is the fun part that brings your pizza to life. Try to use bright colors to make it look tasty and fresh. Now your pizza looks more real and delicious. It’s almost done!
Step 7

Finally, draw straight lines from the center of the pizza to the edge, like cutting a real pizza. Make about eight slices. These lines should look like pizza slices you would see when it’s ready to eat. Try to make the slices even. This last step finishes your pizza drawing. Now your pizza looks real, colorful, and ready to be served. You did it!
See also: How to draw stitch?